
If you’ve created your own custom domain and want to be able to create custom email accounts, but don’t want to register for a Gmail Business account due to cost then there’s an easy way to manage an email server within Amazon called Simple Email Service (SES).
In this article you will learn how to register a domain within SES ready for receiving email, then you will see how we can create an S3 bucket to be your simple inbox storage system, followed by creating a Lambda function to forward any email through to your personal account.
Let’s get started by first configuring your custom domain in SES.
Step 1 – Configure Domain in SES
To get started using your custom domain with unique email addresses, such as
you@your-domain.com
or
webmaster@your-domain.com
you first need to register your custom domain with Amazon SES.
First, start by logging in to your AWS account and from the Service s link search for Simple Email Service .
Once you’ve arrived at the SES home page click on the Domains link. Check the zone you are currently in (top-right corner of the screen next to Support , for this example I’m using N. Virginia ), then when you’re happy with the zone you’d like to register your domain with, click on the Verify a New Domain button.
Enter your domain name in the modal window that pops up, and if needed select the Generate DKIM Settings to perform this task now rather than later (the DKIM settings help to confirm you as the registered domain for email that is sent from your domain).
You’ll then see a set of
TXT
,
MX
and
CNAME
records (if you selected the DKIM option previously) which you will need to add to the DNS settings of your domain.
If you use Amazon’s Route 53 you will have the option to simply click the Route 53 button.
Step 2 – Register Amazon SES in Your DNS
With the
TXT
,
MX
and
CNAME
records provided by Amazon SES you will need to go to your DNS Provider and create those records as instructed.
If you registered your custom domain using Amazon’s Route 53, upon clicking the Route 53 button you just need to confirm these DNS record changes as Route 53 will create the custom record sets on your domain. Be sure to read any warning text that pops up.
Step 3 – Create Email Forwarding Lambda Function
With the
TXT
,
MX
and
CNAME
records provided by Amazon SES you will need to go to your DNS Provider and create those records as instructed.
If you registered your custom domain using Amazon’s Route 53, upon clicking the Route 53 button you just need to confirm these DNS record changes as Route 53 will create the custom record sets on your domain. Be sure to read any warning text that pops up.
Copy Code
On your Lambda function’s console window scroll down to the Function code section where you will some code written in an editor-like view. Copy the following code below and paste it over all the code in the editor.
The only part to this code that you would need to edit is the variable defined as
defaultConfig
.
var defaultConfig = {
  fromEmail: "noreply@your-domain.com",
  subjectPrefix: "",
  emailBucket: "emails-your-domain",
  emailKeyPrefix: "",
  forwardMapping: {
    "@your-domain.com": [
      "your-personal-email@gmail.com"
    ]
  }
};
It’s fairly self-explanatory, but change the following values for these keys accordingly:
-
fromEmail– all emails will have this email address appearing as the sender when you receive them in your personal email inbox. Don’t worry, when you click on the reply button it will insert the person’s email address that originally emailed you. Therefore, just enter an email address likenoreply@your-domain.com. -
subjectPrefix– if you want your emails that have come from your custom domain to stand out from your other personal emails then you can add text that will be prefixed in the subject of all emails sent to your custom domain. -
emailBucket– you will need to create an S3 bucket (later), but for the time being give your bucket the name ofemail-your-domain. This is where SES will store your emails received. -
emailKeyPrefix– if you’re storing your emails in a specific folder in an S3 bucket enter that location here. As you’ll be using the bucket from the root domain you can leave this field as an empty string. -
forwardMapping– if you want all emails for your domain captured and forwarded through then create an object key followed by an array of email addresses you wish to forward through.
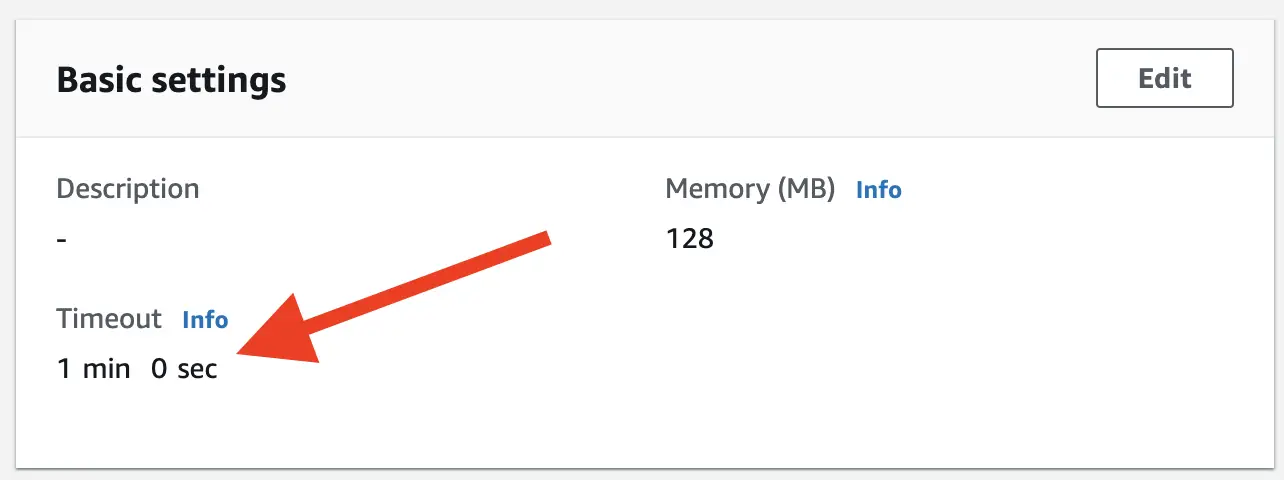
When you’ve finished making all your edits scroll further down beyond your edit to another area labelled Basic settings . Click on the Edit button, and change the Timeout value from 3 seconds to 1 minute. This should provide ample time for the script to run your code and forward it through. Click Save when done.
Finally, click the Save button in the top-right hand corner to save your new function.
Edit Permissions
Before we leave the Lambda section there’s one more thing we need to edit. Click on the Permissions tab, and you should see a section at the top with the label Execution role . In this area, you should see the role name of the user which is responsible for executing your code.
It should be a link that, when clicked, directs you to the IAM Management console.
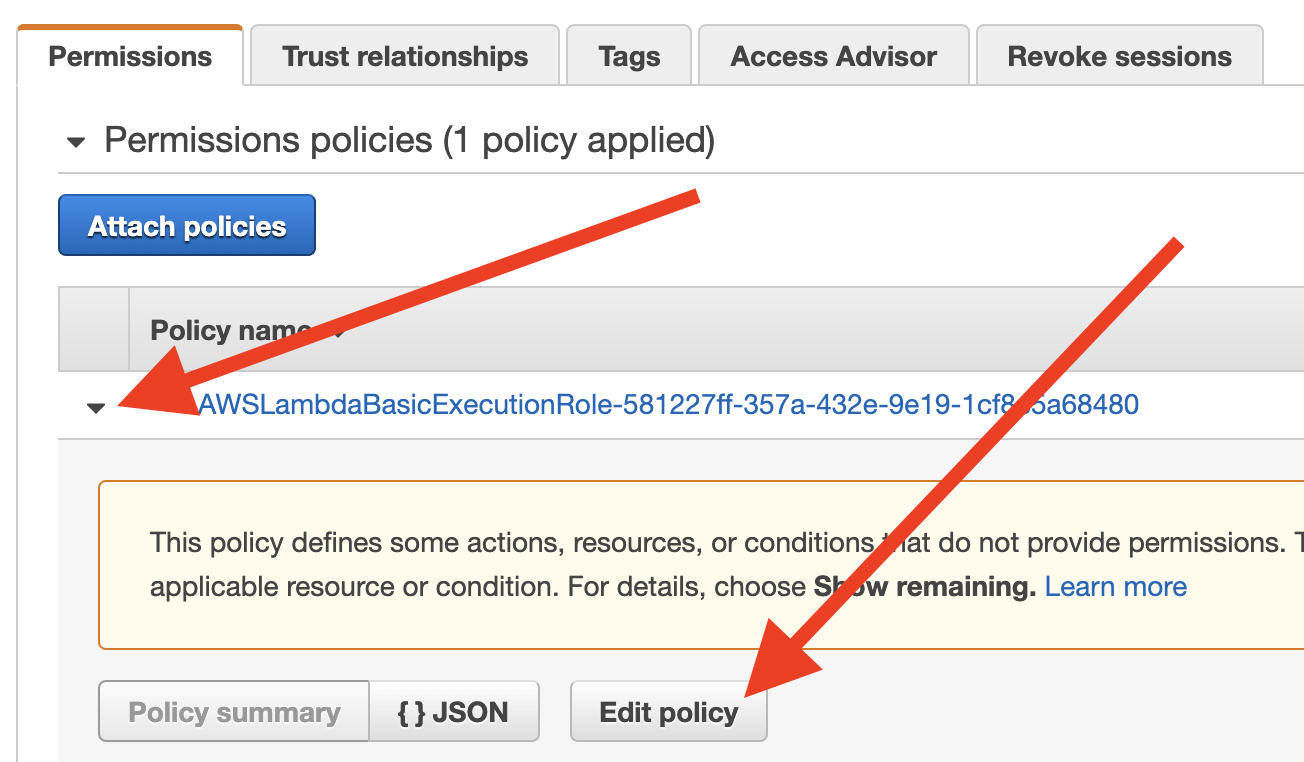
From the IAM Management console, you will see a table with one of the tabs labelled Permissions . Click on the arrow alongside the first policy row in the table to open it up, then click on the Edit Policy button, like so:
You should see by default a couple of “CloudWatch Logs” permissions. What you need to add is to click on the Add additional permissions link on the right-hand side above the Review Policy button.
There are two permission sets we need to add:
- Ability for Lambda to fetch S3 objects.
- Ability to send email.
The first one is relatively straightforward:
- Service = S3
- Read = GetObject (ticked)
- Write = PutObject (ticked)
- Resources = We can leave this to All resources in case we want to implement this user for other SES domains.
The second is just as easy:
- Service = SES
- Write = SendRawEmail (ticked)
- Resources = All resources
When you have finished making these changes to the user, click the Review Policy button.
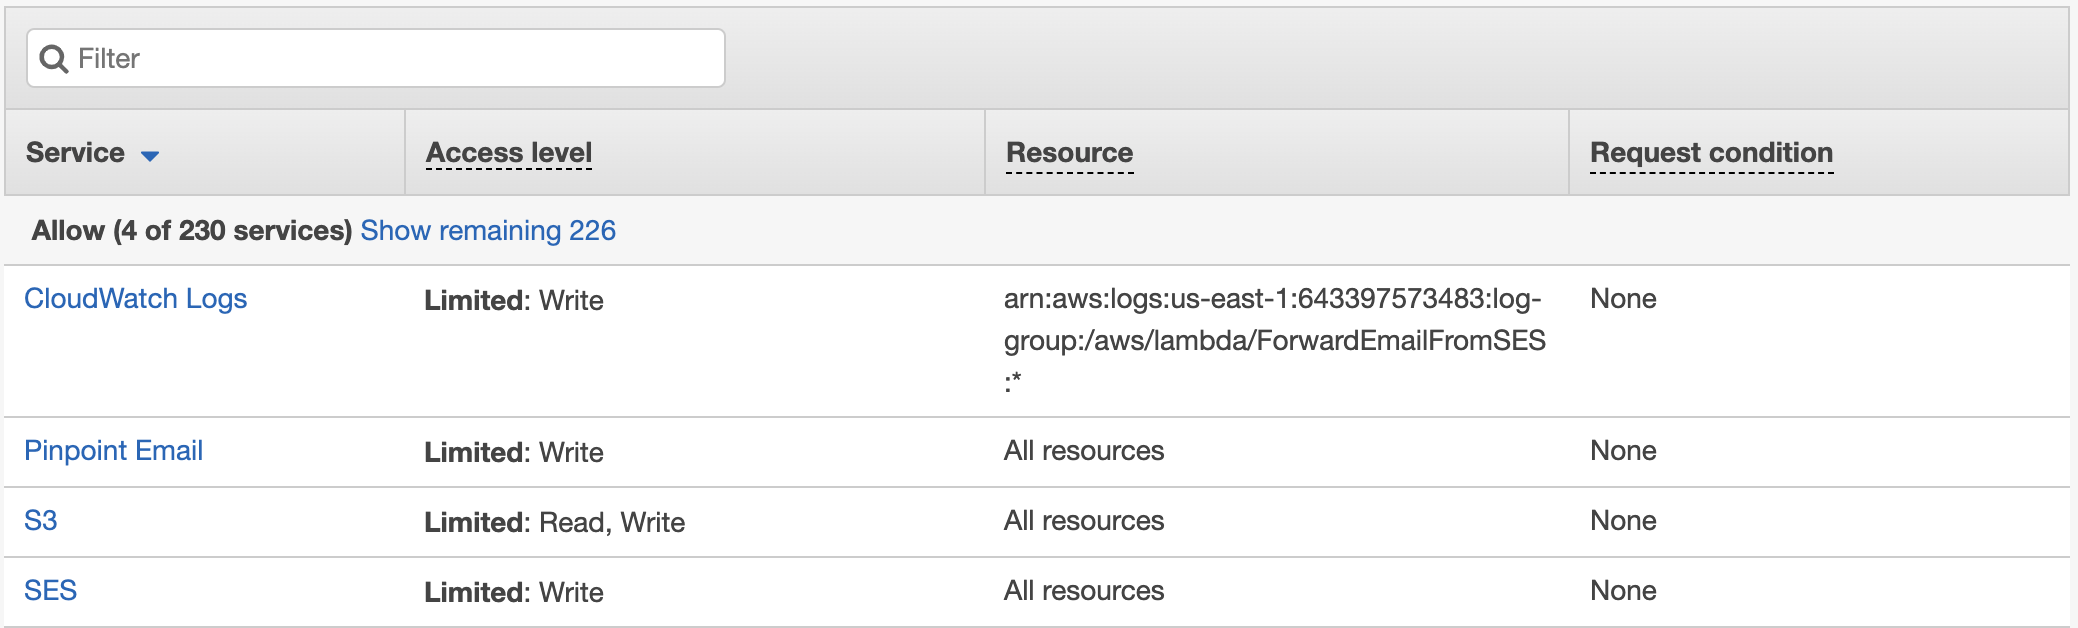
Looking at your new Permission set for your Lambda user should look something like this:
Hopefully with our little detour in setting the permissions of our Lambda user our DNS verification should have finished.
Step 4 – Create Your Rule Sets
Once you have registered all the details within your DNS provider go back to the Domains listing on Amazon SES you should see two status results:
| Domain Identities | Verification Status | DKIM Status | Enabled for Sending |
|---|---|---|---|
| your-domain.com | pending verification | pending verification | No |
Amazon SES is fairly quick in checking your DNS records, but if your domain is pending verification just wait another minute, perhaps go and grab your favourite drink and slowly walk back to your computer.
There’s a little refresh icon you can click on the top-right hand side of the page to refresh the table, rather than having to refresh the whole page.
Once the status for your domain states the following you’re good to go:
| Domain Identities | Verification Status | DKIM Status | Enabled for Sending |
|---|---|---|---|
| your-domain.com | verified | verified | Yes |
If you have everything set up correctly you should notice in the lower-left sidebar a section labelled Email Receiving , and underneath this header, two additional options Rule Sets and IP Address Filters .
You need to create a Rule Set on how you’d like Amazon SES to manage incoming emails to your custom domain, therefore, click on Rule Set .
Active & Inactive Rule Sets
The only confusing aspect regarding Amazon SES is that there’s ever only 1 Active Rule Set . You may have hundreds of domains, but they need to all be registered with the 1 active ruleset.
Therefore, if you see a button labelled View Active Rule Set you will need to register your new custom domain here, otherwise click on the button Create a Rule Set .
When creating a new rule set, simply start by giving your ruleset a name, eg.
my-email-rule-set
.
When you’ve successfully created a name you should see a button labelled Create Rule , click on this button.
Create Rule
To create a rule within Amazon SES we need to proceed through four steps. First, you need to decide on what email addresses you want to capture – whether it’s a specific email address (eg.
me@your-domain.com
) or all email addresses.
This guide will assume you want to capture all emails sent to your custom domain, but if you find you’re collecting too much spam for an email address you never created you might want to set specific rules for filtering those emails elsewhere.
Step 1 – Add Recipient
On the Recipients page add the email address you’d like to perform a rule on. If you want to capture all email just enter your custom domain, otherwise enter a specific email address you will be using.
Click on the button Add Recipient and SES will perform a check to see if the domain has been registered and verified.
Once you’ve registered all the domains or specific email addresses you can proceed by clicking on the Next Step button.
Step 2 – Add Action
You need to instruct Amazon SES on how you’d like to handle the inbound email. You can select any number of options, however, for the purpose of this exercise select S3 as we will be storing our email and forwarding it through.
Add S3 Action
Click on the drop down field labelled <Select an action type> followed by S3 .
An S3 action area populates with additional fields to complete.
Click on the drop-down field for the S3 bucket and select
Create S3 bucket
. From the modal window that pops up enter a name, eg.
emails-your-domain
.
Don’t add an object key prefix to your email records, and if you want you can select to encrypt your emails.
Add Lambda Action
After setting the S3 actions you need to trigger a second action to forward through the email to your personal inbox as detailed above in Step 3. Click on the <Select an action type> button and select Lambda .
For the Lambda Function drop-down select the function you created in Step 3 ForwardEmailFromSES . Leave the Invocation Type as Event .
Once you’ve added these two actions you’re ready to proceed to the Next Step , click that button.
Step 3 – Rule Details
Give your rule a name, eg.
email-forwarding-your-domain
. Leave
Enabled
checked, and
Enable spam and virus scanning
checked (if you want).
In the Rule Set area select to add this rule set to an Active set. You’ll know if it’s an Active ruleset if it contains (Active) alongside the name.
Lastly, in the Rule position area select where you want this rule set to be inserted after other rule sets you have. If there is no other ruleset then you will see <Beginning> which is the only option.
When you’ve added these details click on Next Step to finalise and review.
Step 4 – Review
Check everything is as you’ve set and finish this process by clicking Create Rule button. You may get a Missing Permissions window pop up warning you that it does not have the permissions to invoke your Lambda function, click Add Permissions to enable SES to run your function.
Step 5 – Test
Now you’ve arrived at the final step it’s time to start the ignition and to see if this baby will start.
Create an email to your custom domain. If you’ve created a specific email custom domain account send it to that email address, otherwise if you’ve applied the whole domain send any random email.
Hopefully, within a matter of seconds, you should receive your email within your own personal inbox!
If you didn’t you may want to check the following:
Did the email arrive in S3 bucket?
To check the email has been received by Amazon, go to your S3 bucket
email-your-domain
.
Within this bucket, you should see a string of characters for the file name, click on this object and download it to your computer.
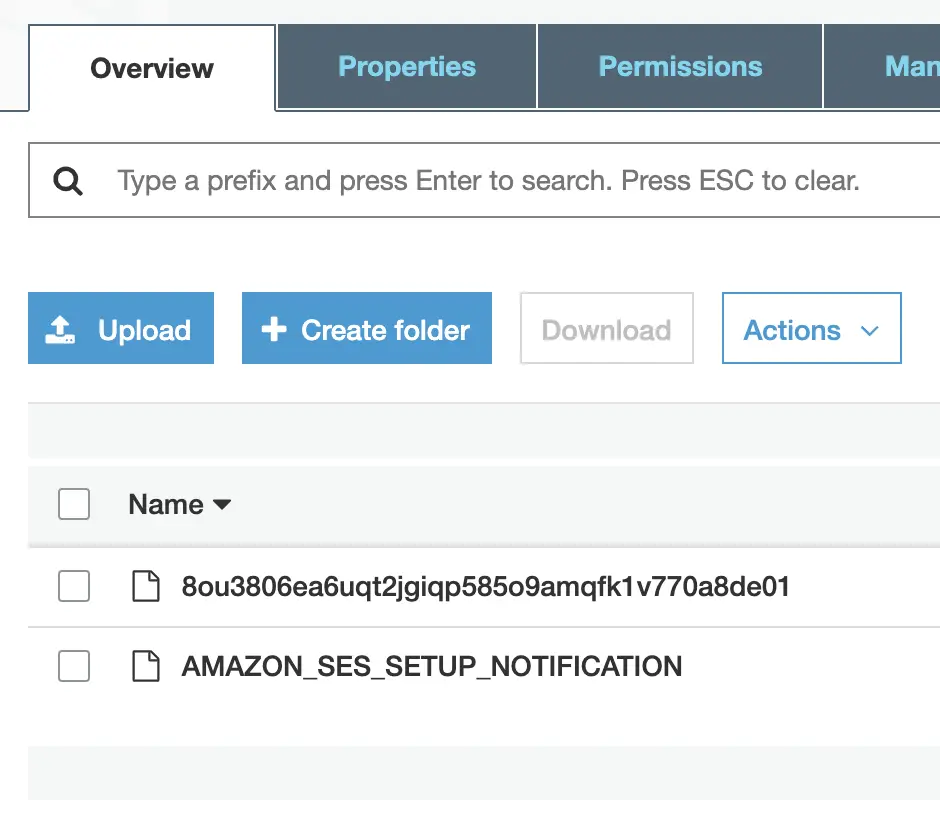
Open it up with a text editor, and you’ll see a mass of information, and hopefully at the very bottom the message you wrote to yourself.
If this works, then we know it’s not an SES issue (or an S3 issue).
Automatically Remove Emails in S3
However, while you’re here in S3 you can set a property to remove emails automatically after a certain number of days. As you’ll have your emails forwarded through to your personal inbox, such as Gmail, you’re likely to have two storage places – making one of these stores redundant.
Therefore, S3 provides a way where you can automatically remove files in the bucket after a certain period.
If you’d like to set this property, within your S3 bucket click on the Management tab, then click on the Lifecycle button followed by the Add lifecycle rule .
Give your rule a name, something meaningful you will remember in time, perhaps
Delete emails after 3 days
. Select the scope of the rule to
Apply to
all
objects in the bucket
then click
Next
to progress on.
You can skip the Transitions step unless you’re looking to transfer items from the S3 bucket to a different S3 bucket type to save on archiving costs.
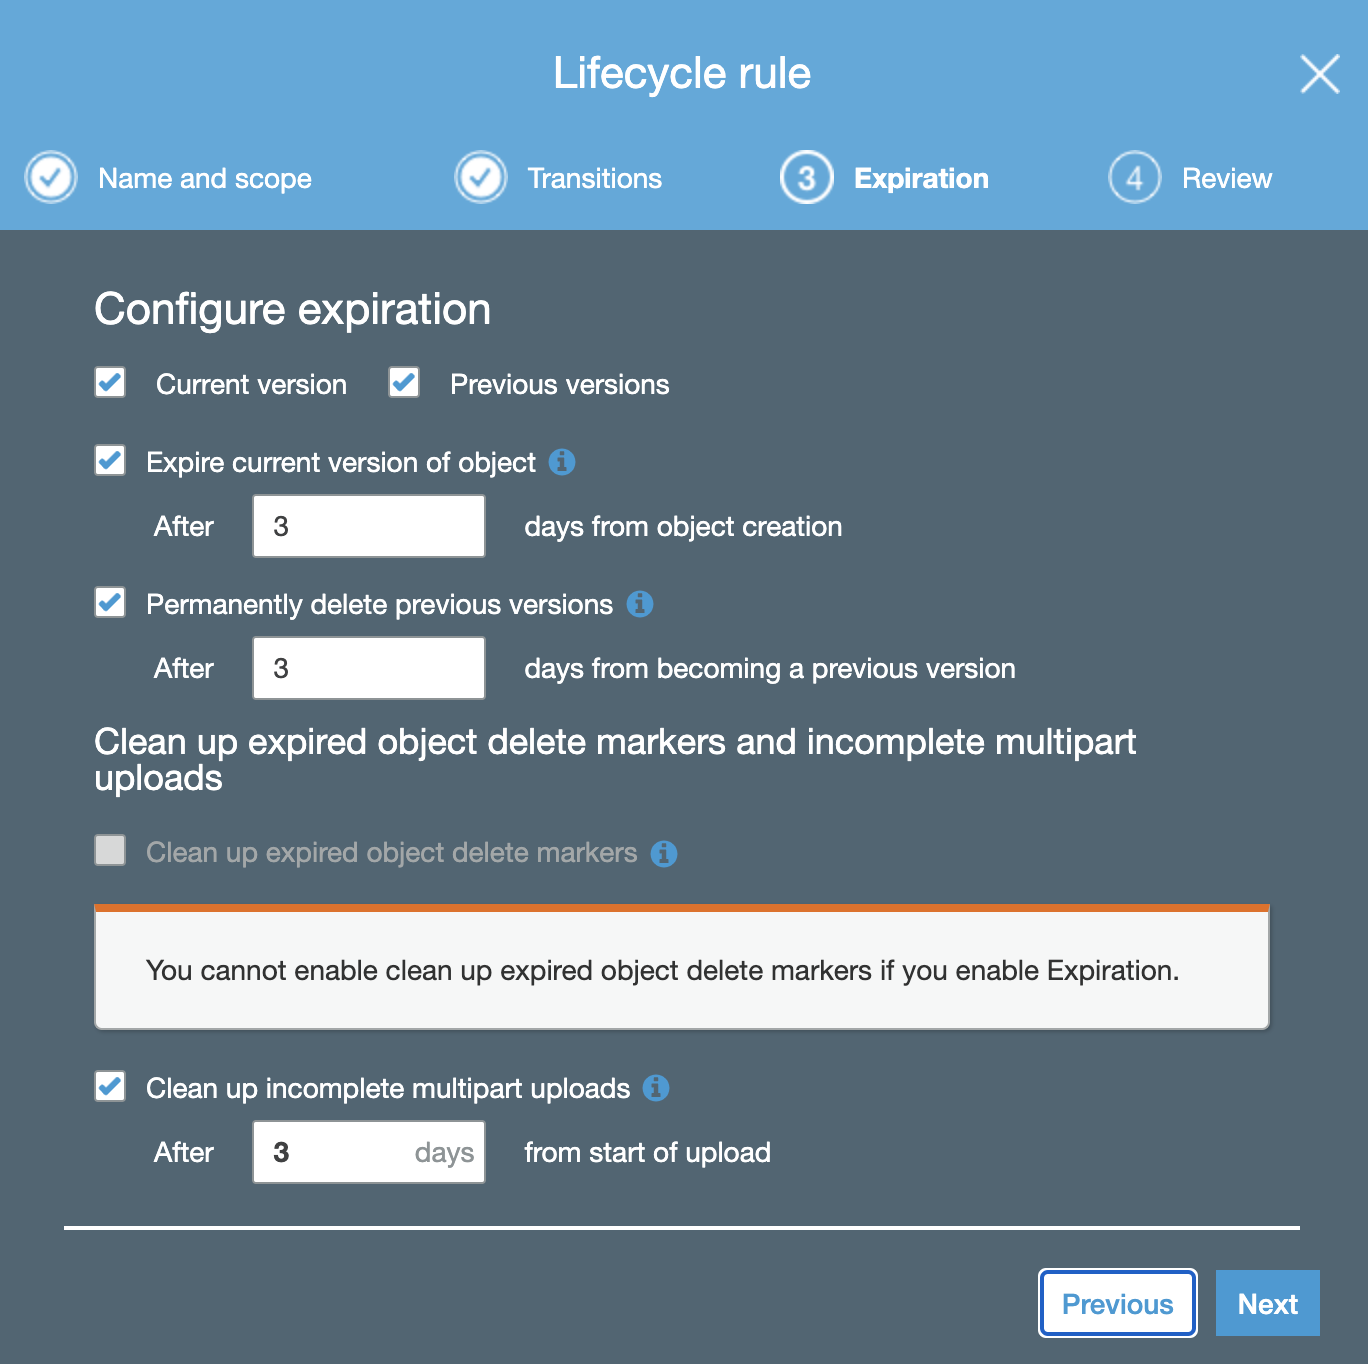
At the
Expiration
step, tick both the
Current version
, and the
Previous version
boxes, then set the
Expire current version of object
field to
3
and the
Permanently delete previous versions
to
3
, you can also tick the
Clean up incomplete multipart uploads
box and set that to
3
too if you wish.
At the final stage of Review check the box to acknowledge the impact of what these rules will do to your objects and if you’re content click Save .
Check your CloudWatch logs
The other area where things can break is your Lambda function. Either the script didn’t have enough time to execute your script, or you didn’t set the correct permissions.
The way you can determine what happened is to open up your function, click on the Monitoring tab and then click on the View logs in CloudWatch button.
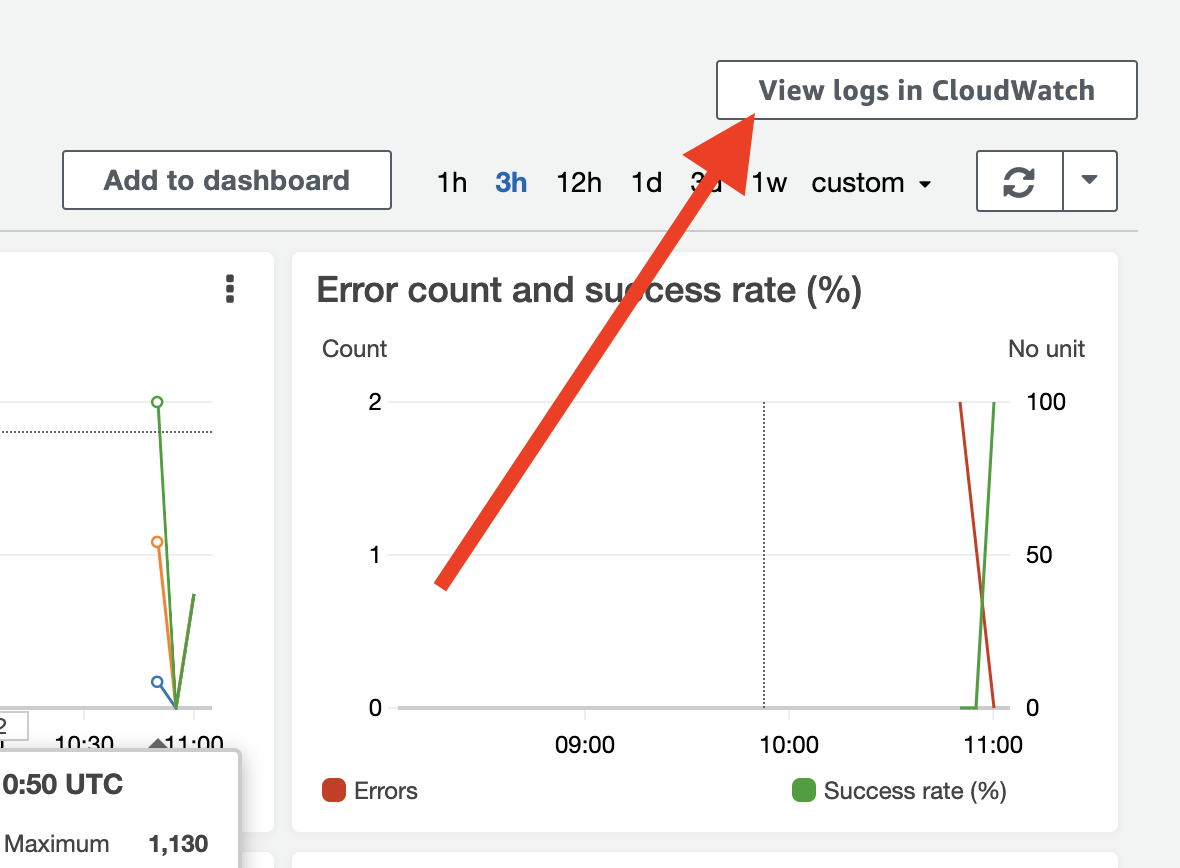
From this page, you should see a table in the Log Streams section where you see records of what Amazon has been able to capture for the Lambda function processing. Click on the most recent time-stamped record to obtain additional details.
The trick within this logged area is to find something that states either:
- Access Denied – meaning the permissions for Lambda haven’t been set properly, or
- Timeout – meaning you forgot to set the Timeout to a larger time period on your Lambda function’s configuration page:
Conclusion
In this article, you’ve learned how to successfully receive and forward emails to your custom domain. You have been able to configure a rule set to invoke where Amazon is to store and send incoming emails, and you’ve created and configured a Lambda function to perform the necessary forwarding actions.
You’ve also learned how to minimise your email costs by removing emails from your S3 bucket after an appropriate amount of time, and you’ve discovered how to diagnose issues should they arise with diagnosing issues in receiving emails.
Next, you might want to learn how to send email using Amazon SES SMTP and Gmail .